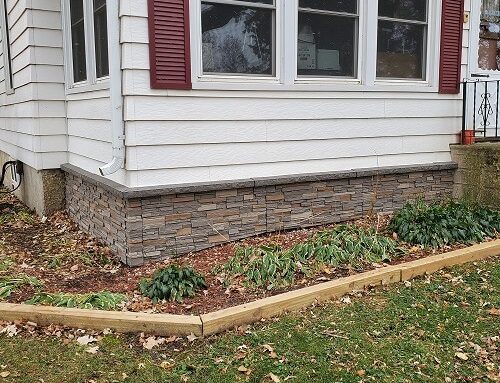
Nowdays there are various types of exterior wall cladding in market , vinyl wall cladding , polyurethane wall panels , PP faux wall panels .
Vinyl Siding
Vinyl wall cladding is the most used and low cost exterior wall cladding . The texture looks more simple ,a very traditional wall cladding material .

Exterior used Polyurethane Stone Siding
Polyurethane materials stone siding is new exterior recently developed . Polyurethane stone sding / Brick Panels capture the real stone or brick texture , all hand made color make the exterior panels real as real stone or brick . Polyurethane exterior wall cladding is more expensive than vinly siding and PP Exterior Wall cladding .

PP Exterior Wall Cladding
PP exterior wall cladding is available in stone pattern , brick pattern design. PP Materials Decoration panesl give your hosue a stone or brick looks without using real stone or brick ,but in low cost .
This installation of decoration panels is very easy , just need screw . They can be easily installed on walls of different structures .


Now let take a look how to install PP Wall Cladding step by step
Install the exterior corner or J channel first.
When using the exterior corner allow 10mm off the floor or fllow a level horizontal line along the wall and find the highest point and the allow 10mm from that point and work back to the corner .This can be achieved by using a string line level to mark the perfect horizontal .
Note this line is crucial to the outcome of a perfect level wall .
Fasten the exterior corner in the lugs provided .
Fasten the start strip to your service leaving a 3 to 5 mm space between the starter strip and exterior corner fastening ponit . When using J channel leave a 20mm spacing between the starter strip and follow the horizon line . Fasten start strip and J channel in a approximately 300 mm intervals

Install Panels on start strip
Determine the amount of panels you will need for the wall by measuringthe total length and height . Dividing by 1000mm for the length and 450mm for the height ( see your panel specification) remembering to deduct the exterior corner size .
Starting from the left to right , start your first run with your cut panel placing it into the start strip and sliding it left flush with exterior corner .
Remember to checkyour levels and panesl laps regularly .


Ensuring the panels are level and clipped to start strip properly , fasten each panels as you work using a min of 5 fasterners for each full panels . Fasten the panel back using the slots outs making sure the head of screw or nails does not bukle the top edage of the panels .
Note : Check spacing on each panel jonit to keep the space consistent .Line up each joints . Installation is easier by elevating the right side of the panel slightly ensuring all the lapping fingers are properly engaged .


Now take a look a final looking